 Author
 |
Topic: A Wee Story On the Brakes. (Read 1598 times) |
|
PJDavis
Senior Member


2 x 1995 Jag X300 3.2 / 4.0 (Henley) 1957 XK140
 
Posts: 1474
|
 |
A Wee Story On the Brakes.
« on: May 2nd, 2011, 2:24pm » |
|
Hello All!
The pictures are of the near-side.
Removed the road-wheel. First thing I did was remove the spring-clip, you can see by the pic how it was prised off using a screw-driver.
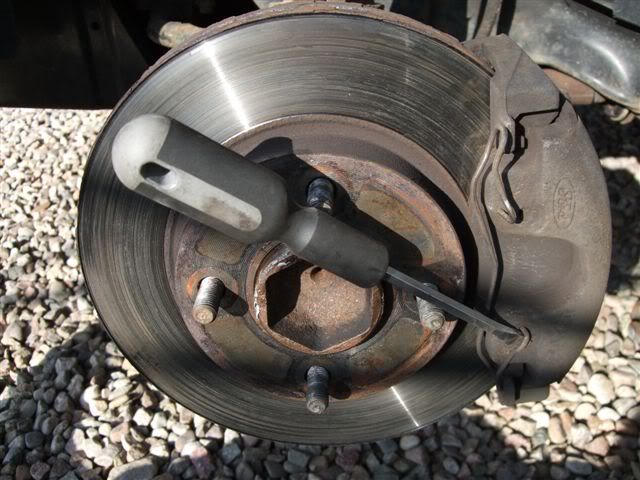
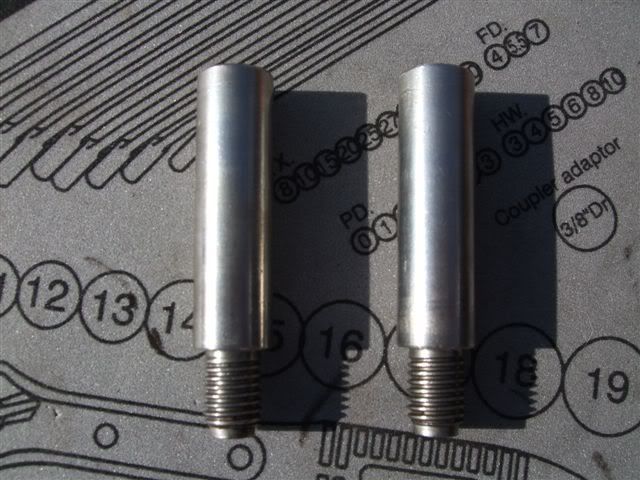
With the clip removed I then loosen the both 'slider-bolts' with a 7mm Allen-key. (You have to prise-out the rubber protecting grommets, before you're able to locate the Allen-Key) In the next two pics, the first one shows the Allen-Key located into the top 'Slider-Pin', the second pic shows Allen-Keys located into both pins.
Now those two pins were pretty tight, you'll need a decent make of 7mm Allen-Key, and you may need to clout it with a hammer. Mine was OK because they had been out before.
Then unscrew the pins fully, and wiggle the calliper off remembering that the pad on the piston side will stay in place. Leave the calliper on a tin of paint close by, not just dangling on the rubber brake pipe.
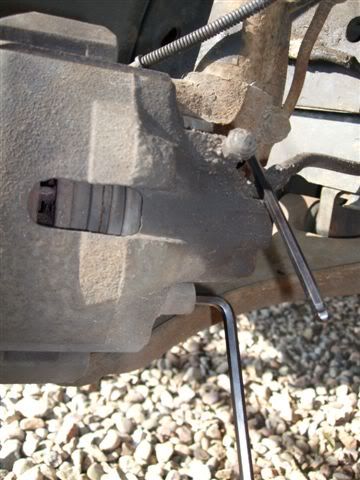
You need to now remove the brake calliper cradle, do this by locating a 15mm single-hex socket onto the two bolts as shown in the next pic.
You can see I've put a socket on each of the bolts to be removed. They were extremely tight, and again it might be an idea to clout it with a hammer. They are definitely 15mm, they may seem tight for the socket to locate, especially single hex, you might need to scrape off some rust first.
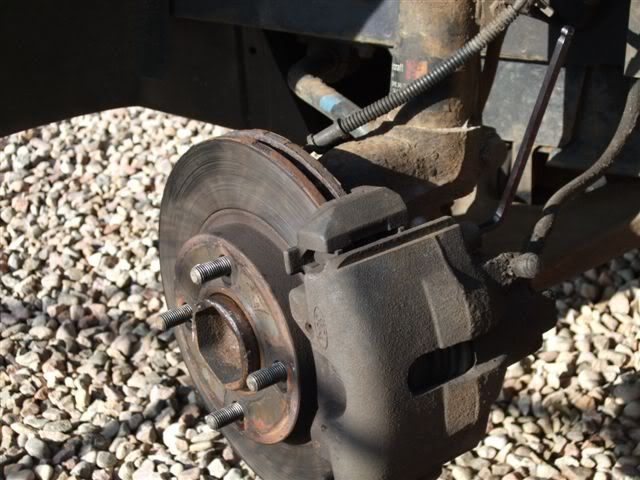
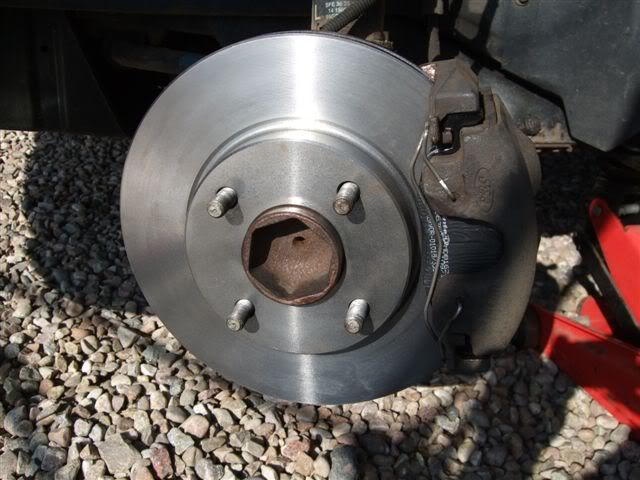
When the cradle is removed the disc will look like the pic below.
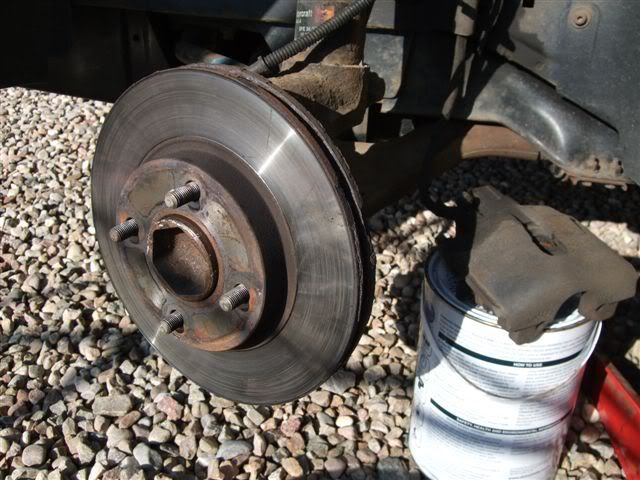
Now remove the disc, by simply pulling off. In some extreme cases you might need to give the disc a hefty belt because it's rusted on. (Worth noting that on many other cars, there is a locating screw, especially cars that use bolts to hold the wheel on)
The disc removed, the hub will look like the pic below.
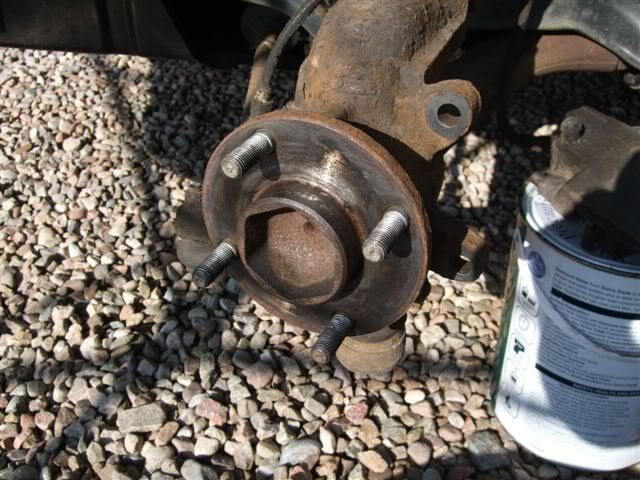
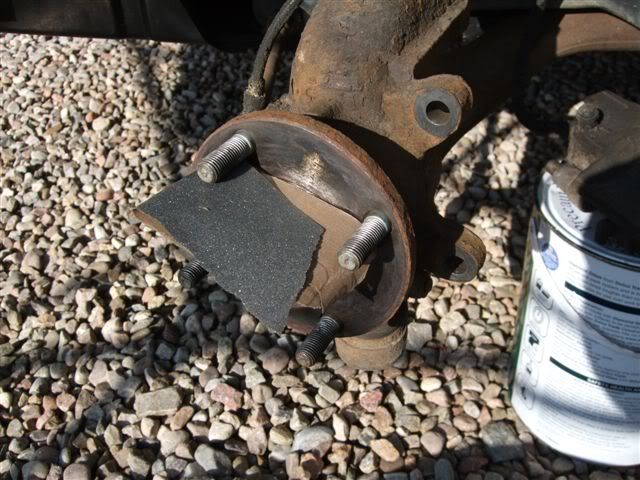
Now's the time to give everything a good clean. I started by giving the hub centre a sand with 180 grit Wet & Dry. Now you might not need to do this, but having just had the 12 spoke alloys powder coated, they were a bit tight on the hub-rim. So I cleaned the rim up and applied copper-slip. See pic below.
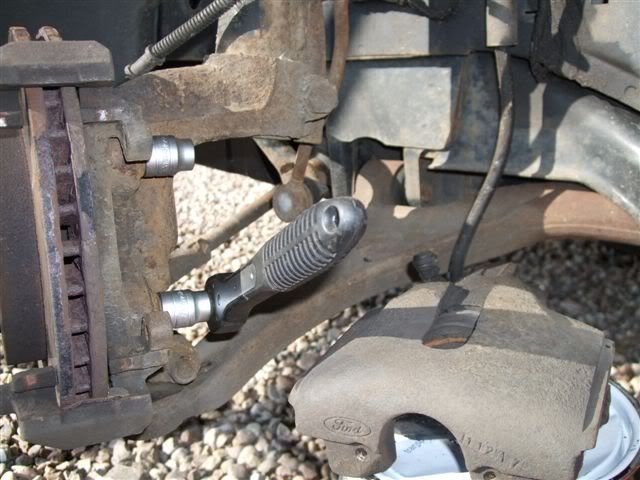
Attention was then turned to the calliper, I removed the piston-side pad, by prising it out, and removed the two sliding pins, see pic below.
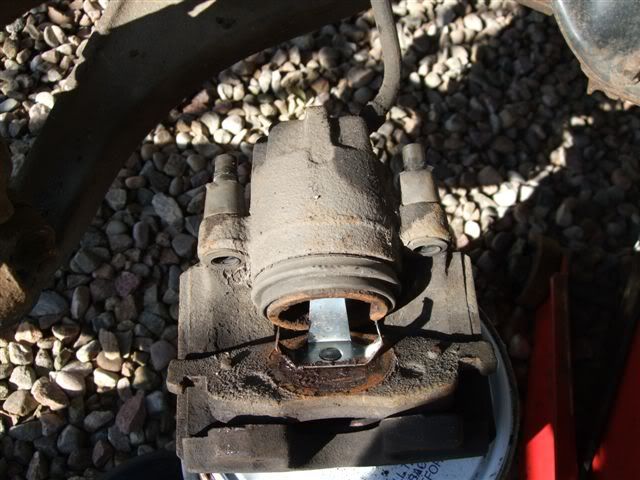
I have a tool to push the piston back in evenly, I then cleaned the calliper with a wire-brush being careful not to damage the piston seal. Check the piston seal, if it's damaged or split, it might be best to get a seal-kit and replace it. All that remained to be done now was to clean the cradle with a wire brush. The cradle can get quite rusty and will probably need a good scrape with an old screwdriver, and plenty of wire-brush work. (It might be a idea to wear a face-mask, the dust can be quite unpleasant and 'cloying') Give the two slider pins a good clean-up, they should look like 'two-new-pins. see pic below.
Putting it back together is as easy as just a reverse procedure. After you've given the new disc a clean with something to remove the preserving grease, (petrol would do) then locate the disc over the hub first. Then bolt the cradle back in place. You might like to put a bit of copper-slip on the back of the pads, just a smear, then clip the piston pad into the piston, and whilst holding the outer pad in place slide the whole calliper, with pads, over the disc. Put a generous amount of copper-slip on the slider-pins, and locate them through the rubber sleeve and into the cradle, this can be a bit fiddly, I find clean hands are a big help! Finally, put the spring-clip back in place, another fiddly job. When finished, it should look like below.
If anyone feels they want to add any tips or extras, please do so. Obviously this is not the only way to remove and replace the front discs and brakes, just a method I use. It might be an idea for someone further up the ladder to save the pics elsewhere, remembering that I've had problems with Photobucket. I have the photos on the hard-drive at home though, so if anyone is really stuck, just email me and I'll send them to you. If anyone has any questions, just ask on this thread or pm me.
Hope that's a help, Peter.
|
|
 IP Logged IP Logged |
I love 'Movvy'
1995 Jaguar XJ6 X300 3.2 (Henley)
1995 Jaguar XJ6 X330 4.0 (Dopey)
1957 Jaguar XK140 USA (converted to RHD, and to have fitted Mk10 420G Engine with BW 65 Auto Trans)
|
|
|
Highlander
Moderator
Expert


13 Scorpios, XR4x4, Suzuki SJ413 for off road :)
Posts: 8244
|
|
Re: A Wee Story On the Brakes.
« Reply #1 on: May 2nd, 2011, 2:43pm » |
|
Excellent Peter, I'll move it "how to" 
|
|
IP Logged |

on Oct 17th, 2011, 12:35pm, Simmo wrote:I give up !  Too much for an old boy! Too much for an old boy!  |
|
|
|
|
|


 Home
Home Help
Help Search
 Members
 Login
Login


 Send Topic
 Print
Print