 |
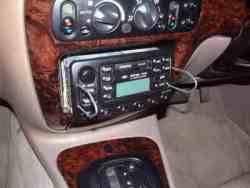
Using a set of
radio pullers I pulled out the radio. The pullers are inserted into the front
holes, then they are moved outward to release the slide locks. Pulling gently
and evenly the head unit slides out.
There is enough length on the wiring to remove the radio completely from the
housing – but work carefully because you may have to ease the wires free. |
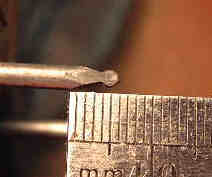
| If you do not have
a set of pullers, they may be difficult to find. You can fashion your own from a
wire coat hanger bent to shape. I have shown my set next to a ruler.
The points are filed to a notch here shown side
view: |
 |
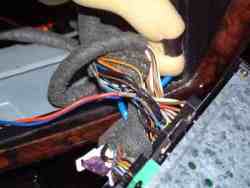 |
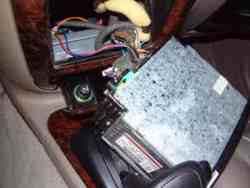
During the course of testing, I
turned the radio upside down. I found the wire at the bottom of the inner set of
three connection blocks, light blue with an orange stripe.
I broke into this wire, joined it to two
3amp wires and soldered them together. I needed a second wire for the Sub – you
may only need one wire connected here.
I insulated the connection carefully. If you
do not have a soldering iron to hand you can use a connecting block; the
insulated blocks with two screws which tighten up on the bared wire.
I would not recommend "scotchlock"
connectors: they are easy to use but IMO they are prone to bad connections. |
| Now a permanent live wire is
located. Usefully, just beneath the radio is the cigar lighter. It is both
permanent live, and is also a high amperage wire, because it runs the cigar
lighter coil which draws quite a current. I made two connections with 10amp wire
to this, one each for the sub and the amplifier. |
 |
| I fed all of the wires through
under the passenger glovebox and beneath the trim panel at the bottom of the
passenger doors, under the rear seat and into the luggage deck. |
The screw covers on the floor
trim panels have to be replaced – these plugs are available from Ford and cost a
few pennies. It is worth replacing them because it is impossible to get them out
without chewing them up and then they look unsightly.
|
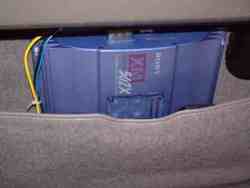 |
I selected the rear of the
single split seat to place the amplifier.
I predrilled 1/8” holes through the carpet into
the metal seat back, and then used short self-tapping screws to secure
the amplifier firmly in place.
The connections you see on the top of the
amp are the permanent live connection (from the cigar lighter supply) the
switched live (blue/orange wire on the head unit) and an Earth lead, which is
secured to a convenient bolt on the seat mounting out of sight.
The amplifier is not tested at this
point – switching it on without speakers connected can cause damage. |
