Removal, Inspection and Replacement of the Sun Roof Motor
The basic instructions for the removal of the sunroof motor can be found
here. This however, gives little detail on identifying a common
problem with these motors or how to synchronise the motor with the sunroof prior
to refitting.
I wrote the following instructions based on my own experience in dealing with a
defective motor.
It is worth noting at this point that a No. 2 cross-head screwdriver and a No.
T30 star-head screwdriver is required to remove the overhead console and the
motor.
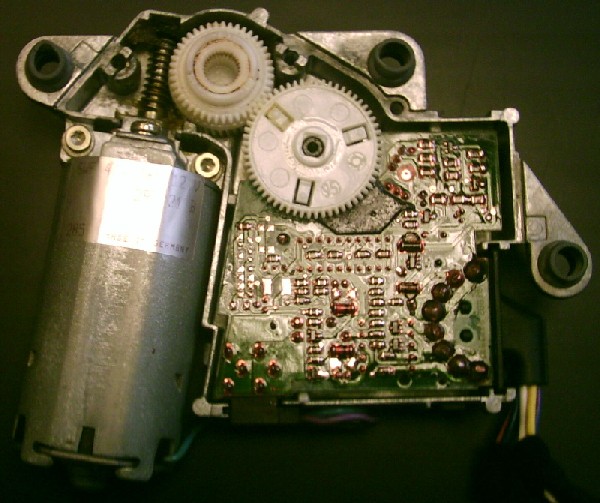
Once removed, the plastic cover-plate can be easily removed by unscrewing the
two No. T20 star-head screws and carefully releasing the four plastic retaining
clips.
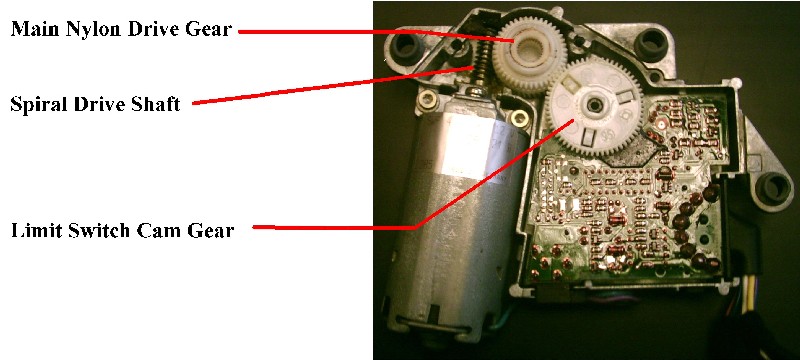
On inspection, you will see
that the main nylon drive cog is driven directly by the metal spiral drive shaft
of the electric motor. This alone means that any undue stress on the unit is
liable to damage the teeth of the nylon cog, slowly but surely wearing a concave
slot in the nylon.
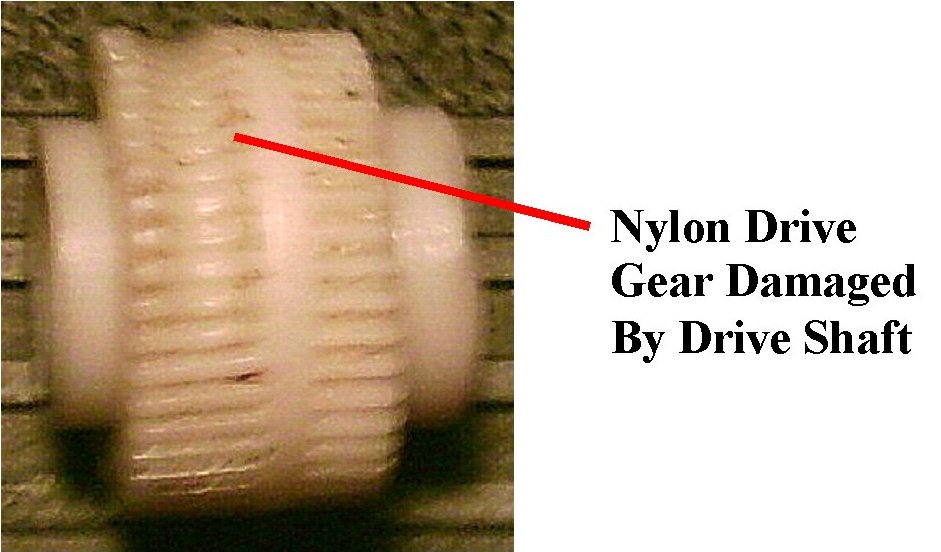
Risk of damage to the unit can be greatly reduced by regular maintenance and
greasing up of the sunroof, ensuring it slides freely.
Andrew H has provided excellent detail on
maintaining the sunroof.
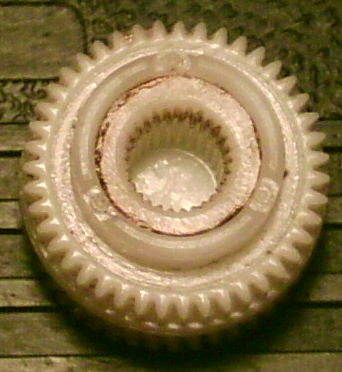
It’s also worth checking the condition of the splines which interface with the
sunroof gear as these too are prone to stripping.
I’m sure there’s a thermal overload device built into the unit, but it takes
considerable excessive load before tripping to reduce unwanted stop-starting of
a sunroof which may not be freely running.
If you’re acquiring a second hand motor from a breakers yard, it’s worth taking
the necessary tools to strip the motor and checking on the condition of the
drive gears. If there’s any wear as described, then it’s probably seen the best
of its life and not worth wasting your money on.
Because the plastic cover plate acts as bearing points for the drive gear, it’s
probable that the gears will fall out of alignment when you remove it. This is
nothing to worry about as it’ll square back up on reassembly.
One excellent feature of this unit it that its sun roof stop positions (fully
open, fully closed and fully tilt) are controlled by travel limit switches which
are operated by a cam system located under the other cog driven by the main
drive gear, but this feature does mean that the motor has to be properly
synchronised with the position of the sunroof or the motor will attempt to drive
past its stop positions, never properly close and may damage the drive gear.
Replacing the Motor
Provided the drive gear is in good condition, reposition the cogs and replace
the plastic cover plate, making sure the locating pins fit properly into their
holes in the casing and the cogs fit properly in their locating (bearing
points). Never operate the unit with the cover plate removed or damage to
the drive gear will result.
Because it’s virtually impossible to manually push the sunroof to the closed
position with any degree of accuracy, I found the best way was to push the
sunroof fully open, then connect up the motor to the wiring harness and the sun
roof switch. Don’t actually fit the motor yet.
If you disconnected the battery during removal, reconnect now.
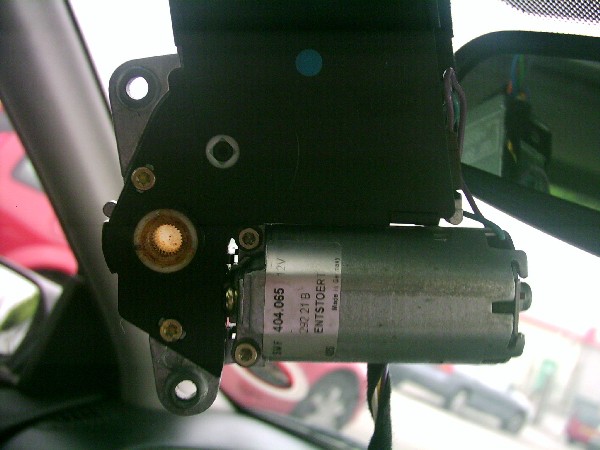
Next comes the tricky bit.
Synchronise the Motor
-
With the motor
turned so you are looking at the cover plate face (see photo above), watch the
main drive gear and press and hold the ‘sunroof open’ button. The gear should
rotate clockwise, continue to hold until it stops. Release the button, then
press it again. If the cog does not rotate, then the probability is that the
motor is in its fully open position. If it does rotate (still clockwise)
continue to hold the button until it stops again and the motor will be in the
fully open position.
-
It’s worth
confirming position and that the unit is functioning properly by running it
through all positions, so press and hold the ‘close sunroof’ button and the gear
should rotate anti-clockwise approximately 9 revolutions and stop. Release the
button – This should be the fully closed position. Press the close button
(tilt button) again and the gear should complete approximately one
anti-clockwise rotation and stop – Fully tilted position.
-
Now return the
motor to the fully open position by pressing the open button, (one clockwise
rotation and stop). Release and press again. (9 clockwise revolutions and stop.)
-
The motor will now
be in the fully open position. Refit, taking care when locating the motor drive
gear onto the sunroof drive gear, secure with all 3 screws and test for proper
operation. If the sunroof operates correctly now then you have finished
the task.
-
If the sunroof
does not completely close before it stops, then this is a good indication
that the sunroof control cables are stretched, and depending on how much they
are stretched, you may wish to consider replacement. You will need to make a
minor adjustment to the sunroof / motor synchronisation though.
-
Press and release
the sunroof close button in very short ‘bursts’ until the roof is completely
closed. (You may have to ‘joggle the roof into position using the open/close
buttons). Then remove the motor and press the open button to return it to its
fully closed position. (This should be far less than one clockwise rotation of
the main drive gear).
-
If in doubt, press
the open button again – approximately 9 clockwise rotations to fully open, then
press the close button – 9 anti-clockwise rotations to fully closed.
-
Refit the motor &
test again. The roof should operate properly, though if the control cables are
stretched, then the roof will never completely open or completely tilt.
This sounds far more complicated than it is, but worth doing properly. If you
get it wrong you may strip another gear.
Andy
Brown

