Scorpio Front & Rear Brake Disc/Pads Replacement
Hi, after discussion through ‘Scorpio Confidential’ I have just got round to
changing the disc’s and pads on my 1997 2.3 Ghia X Estate. Some of my
techniques/practices may not present themselves as ‘best’ but I have been in the
motor trade 21 years, a considerable amount of time within Ford dealerships and
these methods have served me well. The cost of the disc’s (Ford retail price
exclusive of VAT) is £30.96 each. The front’s and rear are the same price
although different discs. The same for the pads @ £26.80 per set. Hope this is
of use to someone.
Brian.
Front Disc & Pad replacement.
TOOLS REQUIRED
7mm Allen Key (long socket type is best)
15mm spanner/socket
Pliers
Sidecutters
Pipe grips (large) or Screw drivers/tyre levers
Hammer (2lb)
Wire brush/Emery cloth
Copper slip grease
Thread lock
Torque wrench. (Essential to torque wheelnuts to 85N/M)
Remove brake fluid reservoir top and protect reservoir with suitable
cloth/tissue. In the event of any brake fluid spillage wash off with plenty of
tap water. (Make sure reservoir cap back on!)
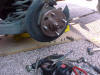
Jack vehicle and support with axle stands, remove road wheels and have ignition
set to position 1 to enable steering to be turned. With pair of pliers or a
screwdriver remove anti-rattle clip [from side of calliper)
Turn steering on full lock to make access to caliper bolts easier, remove
blanking/dust plugs, which shield retaining bolts.
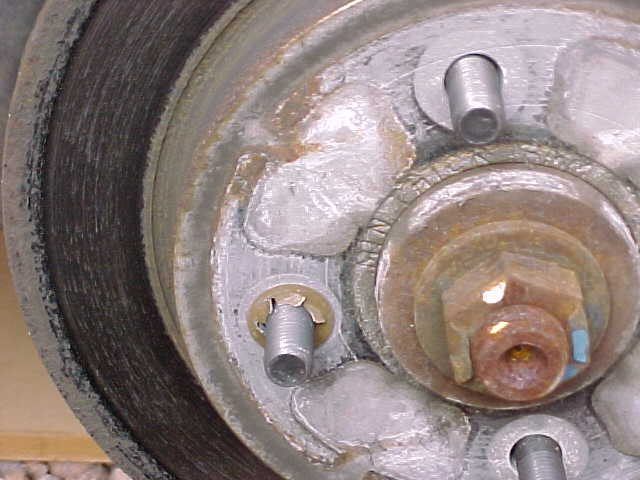
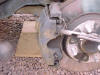
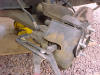
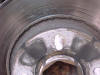
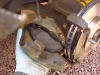
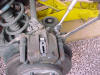
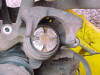
Undo caliper retaining studs two 7mm Allen key bolts and remove.
The 7mm Allen Key caliper retaining bolts and caps
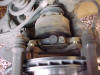
Ease back the caliper piston. I use big grips but you can use a tyre lever or
large screwdriver. Pull the piston back as far as it will go. It can be quite
stiff and strong resistance is felt.
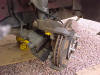
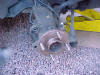
Remove outer half of caliper and support to prevent putting any strain on flexi
brake hose.
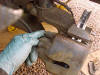
Remove brake pads from caliper. The inner pad is held into piston by spring
clips fixed to rear of pad the outer pad rests in caliper mounting bracket.
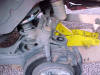
Remove caliper retaining bracket, two 15mm headed bolts. Quite tight as secured
with thread lock.
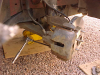
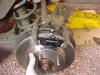
Now you are free to remove disc, remove locating clip first. I use side cutters
to remove and then discard clip as wheel bolts secure disc firmly to hub. The
clip is only used as a retainer during manufacture so a good way of telling if
your discs have been replaced before.
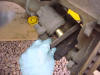
Getting technical now! Big hammer and hit off disc it will probably be tight.
Take care not to hit ABS sensor and watch your eyes/wear goggles as lots of
flying rust pieces etc. Wire brush and use emery to clean hub flange and copper
grease between mating surface of hub and disc. Clean hub flange and copper
grease between mating surface of hub and disc.
Clean caliper retaining bracket and copper slip where pads slide/locate.
Refit caliper retaining bracket, there is a torque setting for the bolts and is
probably the same as the old Granada but I just tighten them up TIGHT! With
thread lock on threads.
Fit pads into caliper making sure you fit the outer pad the right way round!
(Abrasive surface to disc!)…It has been done before!!!
Refit caliper back onto caliper bracket clean and lubricate (copper grease) 7mm
Allen key studs.
And tighten using 7mm Allen Key
Refit anti rattle clip a bit awkward two hands and watch your fingers!
Job done. I have never used the correct torque
settings for any of the brake retaining bolts but there are specified settings
so if you are in any doubt then obtain the correct figures. However I always
torque the road wheelnuts with vehicle weight on ground (85N/M). This is most
important as over tightening roadwheels can lead to disc distortion. The job in
total should take about an hour. Obviously if you only wish to renew the pads
then you will not need to remove the caliper retaining bracket or the disc.
===================
Rear Disc & Pad Replacement
TOOLS REQUIRED
13mm spanner/socket
15mm slim open-ended spanner
Sidecutters
Screwdrivers/levers
Hammer (2lb)
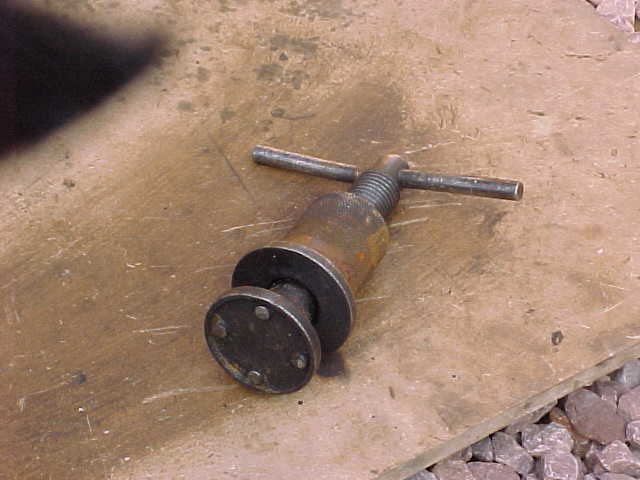
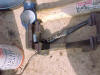
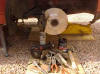
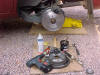
Brake pad piston wind back tool. (See picture below)
Thread lock
Copper slip grease
Torque wrench. (Essential to torque wheelnuts to 85N/M)
Remove brake fluid reservoir top and protect reservoir with suitable
cloth/tissue. In the event of any brake fluid spillage wash off with plenty of
tap water. (Make sure reservoir cap is back on!)
Jack vehicle and support with axle stands, remove road wheels.
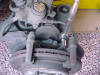
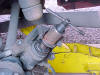
Undo the two caliper retaining bolts using a 13mm spanner or socket holding the
caliper guide with a slim 15mm open-ended spanner.
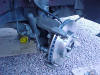
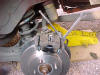
Lever up caliper using screwdrivers from retaining bracket, this is a little
awkward and can be tight. Secure caliper to prevent strain on flexi brake hose.
Remove pads from carrier bracket
Remove caliper bracket two 13mm headed bolts, fairly tight as ‘thread locked’
notice ABS sensor above driveshaft in middle of hub.
Now you are free to remove disc, remove locating clip first. I use side cutters
to remove and then discard clip as wheel bolts secure disc firmly to hub. The
clip is only used as a retainer during manufacture so a good way of telling if
your discs have been replaced before.

Getting technical now! Big hammer and hit off disc it will probably be tight.
Take care not to hit ABS sensor and watch your eyes/wear goggles as lots of
flying rust pieces etc. Wire brush and use emery to clean hub flange and copper
grease between mating surface of hub and disc.
Refit caliper retaining bracket, there is a torque setting for the bolts and is
probably the same as the old Granada but I just tighten them up TIGHT! With
thread lock on threads.
Now fit pads into caliper bracket they slide in either side of disc. Lubricate
ends of pads, which contact and slide in caliper bracket.
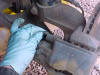
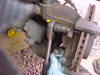
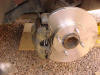
Use special brake pad tool. The tool shown is the genuine Ford one, which fits
Ford models perfectly. The universal tools are readily available from Parts/Tool
retailers and are obtainable for about £10-£15. Note. some of the universal
brake pad piston tools only have two lugs, but work just as well.
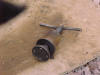
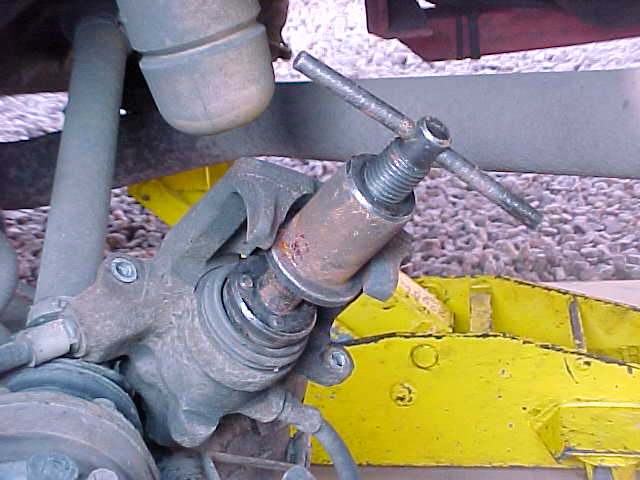
Fit tool into caliper locating four lugs into corresponding slots of piston.
Wind piston back, resistance will be felt.
Refit caliper back onto bracket, sliding over brake pads and refit 13mm headed
bolts using thread lock. Tighten while holding caliper bracket guides with slim
15mm open-ended spanner.
Job done. I have never used the correct torque settings for any of the brake
retaining bolts but there are specified settings so if you are in any doubt then
obtain the correct figures. However I always torque the road wheelnuts with
vehicle weight on ground (85N/M). This is most important as overtightening
roadswheels can lead to disc distortion. The job in total should take about an
hour. Obviously if you only wish to renew the pads then you will not need to
remove the caliper retaining bracket or the disc.
Brian Scott
Lizziescot @aol.com