Last update:

08/03/2005

  Fusebox Rebuild 2

About Us Useful Links Forums Mailing List


Up
Alternator (24V)
Battery
Charging System Tests
Fusebox Rebuild
Fusebox Rebuild 2
Fusebox layouts
Charging System
Starting System
Exterior Electrics Manual
Basic Int Electrics
Aux Warning Systems
Anti-theft Systems


  We all should be aware of the significant amount of damage that can be done by not having a battery cover in place on the Scorpio - it's surprising how many strange faults can linked to this problem and we have even heard from RAC men who have listened to the fusebox 'fizzing' on a wet night on the hard shoulder.

Once the box has been soaked, the only real answer is to replace it - rather than get the Ford dealers to do it, some have opted to have a go themselves and this is Ben Verbeek's account when he also took the opportunity to add an extra connection for his caravan fridge!


A caravan fridge relay and rebuilding a fuse box….

I was one of those lucky guys working on a beautiful Saturday with a beautiful car and getting to grips with the Scorpios electrical systems. The goal was to provide an extra +12v line to feed the refrigerator in the caravan, but only live when the engine is running so save draining the battery.

The solution is actually quite simple: a relay near the battery that switches +12v directly from the battery positive terminal (through a fuse of course). The 
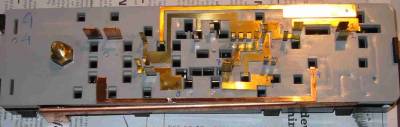
relay is connected to Earth and to an unused connection in the fuse box which carries 12 volts only when the engine is running.  This connection is shown by the red arrow in the picture, near relay R23 which is not actually fitted to my car.

I left the Scorpio half way through the job to go shopping with my wife on this beautiful Saturday. However the sky turned dark and we it rained cats and dogs, and I never even thought of fusebox or it's battery cover!

I came back from shopping and YES the car was open, the covers were not fitted and the lights were on and I could not put them off and everything else happened too! Then I realised the water in the fuse box was the main cause for all of this weird behavior.

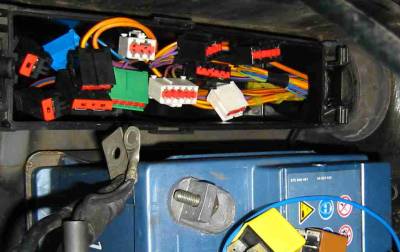
As it was Saturday afternoon there was nothing else to do than to disconnect the fuse box, dry it, clean it and reinstall it again. Because drying with a hairdryer just did not work (once the box is wet the damage has been done) I had to disassemble the fuse box. Do not fear! It is really not complicated; you just need some time and patience and a few photos and notes as you go along. In all it took me 5 hours and since then I have not had a problem. Here are a few tips:


bulletNumber all layers - use an indelible felt pen which can be wiped off with solvent later
bulletNumber every piece of copper and brass and the place where it fits on the layer together (see photo above) so you can remove everything, clean it and reassemble it afterwards.
bulletPut all the pieces of copper from one layer together with the layer plate in one bag per layer.
bulletAll the connectors on the underside are different and the length of the wiring is fixed so these are no problem determining which connector goes where (see photo below).
bulletIf possible: take some pictures before you remove all the relays and fuses. It is helpful when replacing them.


Just have confidence, leave yourself plenty of time and stay cool! Again, it is not difficult but take the time to do the job properly.

Oh, by the way: you disconnected the battery didn’t you?

Ben Verbeek


Copyright © 2004 www.fordscorpio.co.uk