|


|
|
Whenever one offers advice about cars or car care, there will always be someone
who will snort contemptuously and say ‘I knew that!’
So may I say right now that what I include here is the result of my own
experience in dealing with the Ultima. My experiences have cost me money and
caused some inconvenience and I feel it might be of value to others. I am not
trying to teach grandmother to suck eggs – if you have better advice then stick
to it!
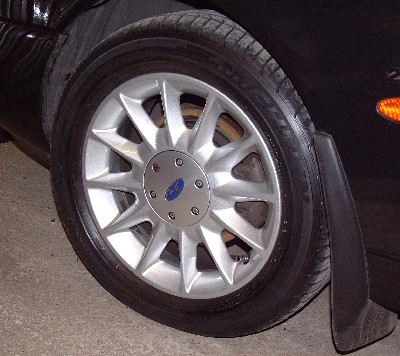
The Ultima alloy wheel is a beautiful design, IMO, and greatly enhances the
appearance of the Scorpio. It is a 6.5J rim, 16” diameter and normally carries a
225 tyre, Z rated for the 24V (which can cruise at 140mph.) It is not
interchangeable on to earlier Granadas because it is bolted with four wheel nuts
instead of 5.
Its smooth radiused edges and spokes makes it very easy to keep clean with an
ordinary sponge, unlike other earlier Ford designs which could be a nightmare to
keep free of brake dust. There is a lacquer layer over the surface of the wheel
which protects the metal and maintains its shine.
The following is advice I offer to help the Scorpio owner.
 After a few months the wheel will lose it’s sparkle. Grime, minor
scratches and tar spots will be too stubborn for a wet sponge. After washing use
a good quality wax car polish and a soft cloth and lightly polish the surface
using the cloth wrapped over one or two fingers. This will remove spots of tar
and minor surface scratches and help to throw off water, and does not take as
long as you might think. Never try to polish a dirty wheel; the cloth
will pick up tiny pieces of grit and score the surface.
After a few months the wheel will lose it’s sparkle. Grime, minor
scratches and tar spots will be too stubborn for a wet sponge. After washing use
a good quality wax car polish and a soft cloth and lightly polish the surface
using the cloth wrapped over one or two fingers. This will remove spots of tar
and minor surface scratches and help to throw off water, and does not take as
long as you might think. Never try to polish a dirty wheel; the cloth
will pick up tiny pieces of grit and score the surface.
 | Once a year in the autumn use a protective coating, like Turtle Wax Wheel
Protector. This acts like'Rain-X' and helps to prevent the brake dust from
settling on the wheel. |
| Wash the wheels regularly to keep the lacquer coating free
of brake dust. This dust can be corrosive, eating into the lacquer so that
the appearance becomes blackened. Once the dust has eaten into the surface
abrasives have to be used before the blackening is cleaned off and with the
lacquer removed the metal becomes dulled and patchy. When washing use a wet
sponge and plenty of fresh water, otherwise the brake dust can be picked up
and could scour the surface.
On the right, a week of touring in the Peak District has left the wheels
black with dust - and it waits to etch into the lacquer with the heat of the
brakes and the rain ... |
 |
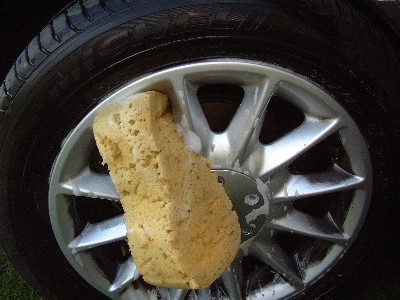
| Washing the flat face of the wheel first, and now working
round the inside of the spokes. Plenty of water keeps the grit from marking
the wheel. |
 |
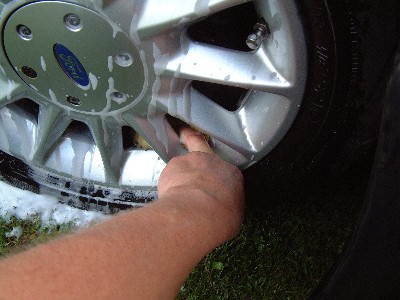
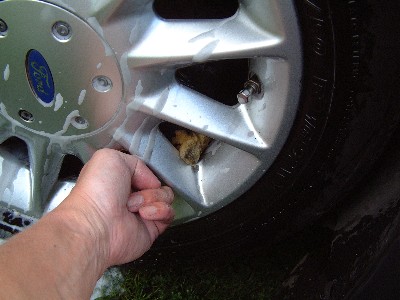
| Now working a small sponge round the rim and behind the
spokes cleans these and prevents dust collecting there. This stops a run-off
of dirt from the back of the wheel collecting in the corners of the spokes
and starting to corrode. |
  |
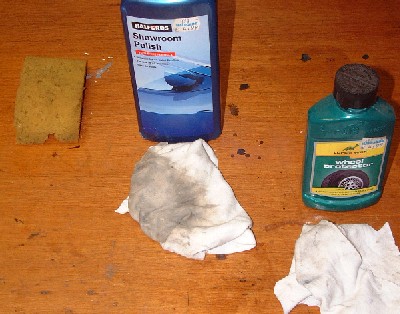
| Here are the three stages of cleaning:
1. Wet sponge and leather off (Weekly)
2. Polish, (Quarterly)
3. Surface protector, (Annually, in the autumn) |
 |
| ... and the result - no, not a new wheel. This wheel is
original with the car, built in October 1995
and has been spinning away on the front of the car for 116,000 miles and 9
years. New tyre? Er, no. Fitted in March 2003, it is 17 months old in this
photo (see below). |
 |
Protect the Tyres, too.
Now don’t forget
those tyres. If you have the 24V Cosworth you should have Z-rated boots on, and
they are expensive. To protect them tyre manufacturers actually recommend a
light coating of wax, rather than one of the many tyre cleaners which you can
buy. Cheapest and most effective
(IMO) is ordinary shoe polish applied with an old shoe brush. Buffed up lightly,
the polish brings the tyre to a nice black shine which does full justice to the
bright alloy wheel. It helps to keep the rubber clean by throwing off water and
protecting it from road salt and UV from the sun.
Getting the Hump
Take great care when driving over speed humps. The wheel is deeply
dished 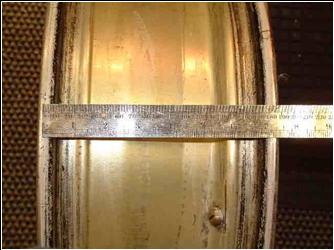 leaving the inner rim
unsupported so that the soft alloy is easily flattened if you hit a speed hump
or other obstacle too fast. The
photo right shows an Ultima wheel – it is waiting for refurbishment because of a
flattened inner rim! The outer rim
is well supported by the spokes, but as you can see from the ruler there is
about 5” (120mm) of dish on the inner rim which makes it vulnerable to damage.
For the same reason, I would advise against running up over a kerb for parking
etc. Damage can be caused at a very low speed.
Note: a flattened front wheel rim will show as a slight wobble on the
steering at low speeds. On the rear, a flattened wheel will cause a drone at
high speed, the loudness depending on how severe the flattening is, and may also
make the CD-changer prone to skipping on uneven surfaces. See
Roadwheel
Repairs leaving the inner rim
unsupported so that the soft alloy is easily flattened if you hit a speed hump
or other obstacle too fast. The
photo right shows an Ultima wheel – it is waiting for refurbishment because of a
flattened inner rim! The outer rim
is well supported by the spokes, but as you can see from the ruler there is
about 5” (120mm) of dish on the inner rim which makes it vulnerable to damage.
For the same reason, I would advise against running up over a kerb for parking
etc. Damage can be caused at a very low speed.
Note: a flattened front wheel rim will show as a slight wobble on the
steering at low speeds. On the rear, a flattened wheel will cause a drone at
high speed, the loudness depending on how severe the flattening is, and may also
make the CD-changer prone to skipping on uneven surfaces. See
Roadwheel
Repairs
For the Perfectionist
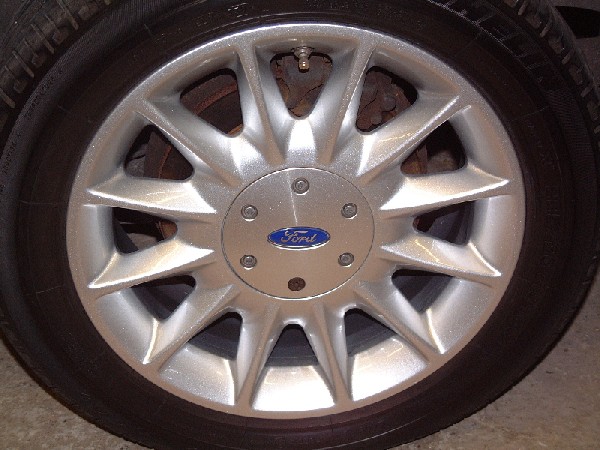
If you intend to show your car, for the very best effect consider
removing the wheels and cleaning and lightly polishing the inside of the
wheel. The reflection from the bright alloy behind the spokes and around the
inside of the wheel rim dramatically improves the appearance of the wheel. (You
normally see them only when the inside surface is covered with dirt and brake
dust.) I noticed this effect when I fitted my new wheel and I was
astonished at how dramatic the difference is.
On the right, a photo of a wheel cleaned in this way. The flash bounces
around the inside of the wheel and has a dazzling effect. No, I haven't used
photo-effects: this is how the wheel looks. Obviously, this sort of effort would
only be for very special occasions.
For a look at Alloy Wheel options for the Scorpio go to
Alloy Options
EricR |
|
