|


|
|
Automatic Wipers for the Ford Scorpio 95+
The Scorpio is a very well equipped car, especially in the Ultima variant.
However it was lacking in some areas in comparison to the competition of the
time. I decided to add features to the vehicle to further the equipment level.
The first project to be considered was automatic operation of the front
windscreen wipers.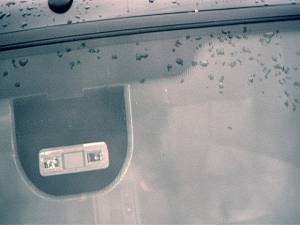
Technologies
The idea of automatic wipers is not new and various technologies have been used
in the past, all with some degree of success. The major technologies are briefly
described here.
Conductive.
This system uses a sensor that basically consists of two sets of contacts
separated by an insulator. When water falls on the sensor, the water conducts a
signal that alerts the system to water on the sensor. This system has some
fundamental problems, the sensing elements oxidize and become unusable, dirt can
foul the sensor and it’s difficult to design a sensor that the wiper can dry
completely. I had considered a sensor of this type in the past, not for
windscreens, but to close windows and doors on a vehicle when rain was detected.
Capacitive.
Capacitive systems utilize capacitive proximity detection techniques. They are
reasonably successful, but can be susceptible to stray electrical fields; the
electronics tends to be reasonably expensive due to tuning components used in
many designs.
Piezo Electric
This type of system uses a piezo crystal element, this can in fact be thought of
as a microphone. Rain droplets hitting the windscreen cause sound waves at
certain frequencies to be produced and transmitted through and across the
windscreen. The Piezo sensor picks these up, electronics then process the signal
to try and distinguish between rain and other noises. Again this system is
susceptible to false triggering.
Current Monitoring.
In current monitoring designs, the wipers actually have to be switched on
manually when it rains. However the current drawn by the wiper motor decreases
when the windscreen is wet, as less friction exists between the wiper blades and
the glass. The current is monitored and the delay between wipes varied from full
on to intermittent.
Optical
Optical sensors utilise light and the principle of total internal refraction
within glass. In its basic form an optical sensor consists of a light source, a
light detector and an optical assembly. The optical assembly is two lenses and
or light guides. A beam of light is directed through the optical assembly into
the windscreen glass, the light is “trapped” within the glass due to total
internal refraction. This is the principle used in fibre optic cable. The light
bounces from outside surface of the glass back to the inside surface of the
glass until it is picked up by the second optical assembly. If rain falls on the
glass within the sensing area, light “breaks free” as it is directed into the
water droplet, this causes a corresponding reduction in the received light.
Usually a microprocessor is used to distinguish between different amounts of
rain and runs algorithms to provide best wiping results. It would appear that
Optical Sensors are the most popular and reliable method for cost effective
detection of rain, they are reliable and maintained free.
I considered the current measuring method and optical detection, as the others
really did not appear practical for retro fitting, and or just would not be
reliable.
Current measuring was practical and relatively easy, but wasn’t really the
answer as the system would have to be switched on in rain any way. So I decided
upon optical detection.
Sensor
Researching optical sensors, I found many, all designed for the Automotive
Industry. However most priced over £200. I considered making the sensor myself,
but the optical part would be tricky. Then I found a well-specified sensor,
which actually came as a kit with all ancillary parts and was very competitively
priced. The sensor is manufactured and sold in Malaysia. It can be ordered
online by credit card at
www.feliogroup.com The cost at the time was US$ 85.00 to UK; this includes
FedEx to the UK and works out competitively when converted to Sterling.

Component Parts
The sensor referred to as a Rain Sensor, comes packaged with instructions
and consists of two main units. The sensor itself that fits to the windscreen
internally and a control unit or relay module. Additionally a system on/off
switch is supplied and a window tint sheet, similar to the tint around the
interior mirror.
Installation
The instructions provide with the sensor are reasonably concise.
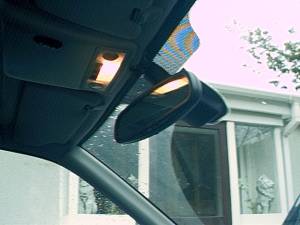
First attach the tinted sheet inside under the interior mirror, ensure the
mirror will not foul the sensor when the mirror is adjusted and if fitted the
front light sensor on the mirror is not completely obscured. The lens module is
then attached, using self-adhesive materials supplied. The sensor is then
mounted on to the lens assembly. Ensure all glass is cleaned prior to sticking
the tint and lens to the glass.
Next run the cable from the sensor along the roof lining and down the pillar.
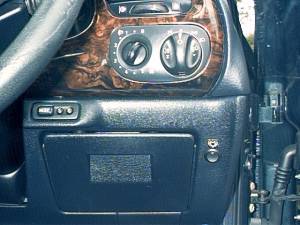
Remove the bottom of the dash to the right of the driver (Right hand drive),
this is done by removing the screws on the side and in the change cubby. The
wire can be located into this area. I fitted the switch to the dash in this area
as shown. It’s a small circular rocker type that looks quit like original
equipment.
The cable now has to be routed into the engine bay to connect to the Relay
Module. From outside the car locate the large rubber grommet that comes from the
bulkhead into the dash area. The grommet can be perforated and the cable with
plug on, fed through. I firstly thread some stiff wire through, then taped the
cable and plug on the end to the stiff wire. Ensuring the plug was well
protected from damage by plenty of tape. This then allowed the cable to be
pulled through from the interior into the engine compartment. Also a switched
supply is required for the system. I took the ignition live directly from the
ignition switch. At the
Ignition switch you can see a multipole connector, on one position 2 green
Wires are found, one thicker than the other, I took the supply from here, using
a scotch lock. Ensure your wire is rated at least at 20 Amperes. Again feed this
wire out of the grommet.
I mounted the Relay Module as shown, using the fixing stud as the ground
connection.

The wiper assembly now has to be removed, this is relatively
easy and is described fully in the Air Conditioning Modification on this site.
Locating the wiper motor plug on the loom side. The wiper motor wiring (on 98
24v Ultima) is as follows.
| Wires on Connector loom side |
Description |
Comments |
| White/Green |
Low motor speed |
|
| White/Black |
High motor speed |
|
| Black |
Position switch Ground |
Not Used on Modification |
| Black/Red or Black/Orange |
Position switch |
|
| Violet |
2nd Position switch |
Not Used on Modification |
Remove the connector to the motor. Cut the two motor wires on the loom
White/Green and White/Black. Then connect to the corresponding wires from the
Relay Module.
Make a connection to the position switch wire Black/Red (I used a splice to join
here you could use a scotch lock, beware if you do to ensure its correct size).
You are not breaking the connection here, but joining to this cable.
| Original Loom |
Relay Module |
| White/Green cut end to connector |
White on Relay Module Unit |
| White/Green cut end to loom |
Brown on Relay Module Unit |
| White/Black cut end to connector |
Blue on Relay Module Unit |
| White/Black cut end to loom |
Yellow on Relay Module Unit |
| Black/Red |
Grey on Relay Module |
Connect the supply and ground as follows.
| Supply & Ground |
Relay Module |
| From Ignition switch |
Red |
| Chassis Ground (Earth/0V) |
Black |
Use insulation tape or self amalgamating tape to loom up all the wiring.
On the Relay Module unit ensure Fuse is in +ve position. The fuse in the unit is
20A, , ensure your cable rating is at least as good as this, if not in a fault
your cable will melt/burn before the fuse downstream blows.
Operation
The system is transparent to the factory fitted design. So all the original
manual wiper functions can be used, even when the sensor is switched on.
When switched on you can see red light from the sensors LED., directing from the
sensor. By pouring water onto the windscreen the system can be tested.
With a light drizzle the system operates in intermittent mode, with low
frequency and slow wiper speed. With normal rainfall, the frequency is medium
and the speed low. In heavy rain the frequency is continuous with high-speed
wipers on.
I find the system very practical and it helps to reduce stress and fatigue on
long journeys, when the rain load is varying continually.
|
|
