![]()
|
|
|
|
|
|
|
Last update: 08/03/2005 |
|
|
|
|
|
|
|
|
|
|
Replacing the High-Pressure Pipe
The High Pressure pipe, (sometimes known as the Liquid Line), runs from the receiver/dryer mounted by the front nearside headlight, underneath the air-filter housing and - on the 24V at least - along the nearside wing behind the nearside MacPherson strut turret and reaches the AC evaporator housing through the engine bulkhead. At the 2004 Orpington Meet John Orford from Aircon Direct noticed that the pipe on my Scorpio Ultima was suspect.
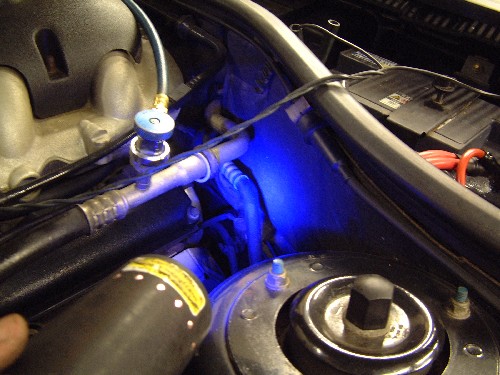
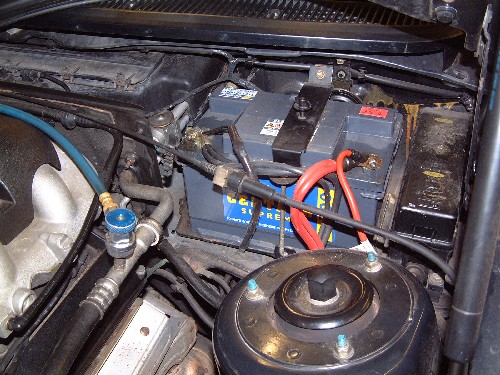
Below, a UV light test of the pipe as it nears the bulkhead. The larger diameter pipe above is the Low-Pressure pipe (gas line) - the gas has been evacuated from the system through this point. Below the metal pipe is the smaller diameter High Pressure pipe, which is mainly rubber and has metal connections crimped at both ends. Here the crimp is leaking. Although it does not show clearly on this photo, the UV lamp shows bright traces around this joint - the crimp has failed and the system has lost a lot of gas. Mark, from Aircon Direct came out to me to fit the new one I had bought (from Ford Parts UK, excellent service, thanks guys.) The pipe runs from the regulator block where it is clamped with a single screw and an H clamp with the Low Pressure pipe above it. In order to release the torx screw securing the H clamp the battery shelf needs to be removed. The rubber bonnet seal is pulled off the top of the bulkhead and the two 'fir-tree' fasteners are pulled off on each side. The battery partition is then removed from the bulkhead, leaving much more room to get to the regulator block.
Above, the battery shelf is exposed. To the left of the battery the regulator block can just be seen.
Now we can get to it, the single torx screw is loosened and this permits the high-pressure pipe to be slipped out of the H-block. The pipe is now pulled though the bulkhead. It is an odd shape at the other end, the metal being kinked twice to allow the pipe to emerge beside the receiver/dryer by the front headlamp. It is the work of but a few moments to remove the air filter complete with the MAF and this releases the pipe so that it can be unscrewed and detached from the receiver/dryer.
The replacement pipe offered up to the receiver/dryer. It comes complete with new seals and so the torx screws can simply be tightened up. Then the system is recharged (again!) and the system tested for leaks. Climate Control back to full pressure and working nicely, thanks guys. Cost? £30 for the replacement pipe and £60 for the recharge.
EricR
|
||
|
|
|
Copyright © 2004 www.fordscorpio.co.uk |
|