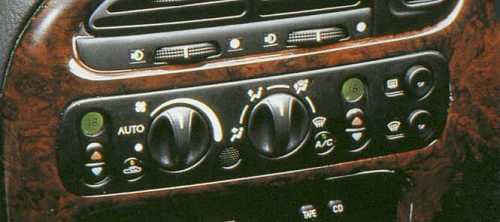
Air Conditioning is standard across the Scorpio range however on
higher marques such as the Ultima, Climate Control is fitted as standard and was
an optional extra on lower spec vehicles.
The climate control on the Scorpio is an extremely sophisticated
system, well ahead of its time when you think that it was introduced in the new
model back in 1994. Even today on brand new cars that do have cc installed it is
rare to find vehicles that have a “dual” system such as is fitted in the
Scorpio. This enables two different zones for temperature to be set one for
passenger and the other for the driver.
To help the new driver become acclimatised
(excuse the pun) to the system they even provided an Audio Cassette with the
vehicle.
Firstly we will run through the operational aspects of the system which should
not be confused with how an air conditioning system works which is covered
here
The idea behind Climate Control is to maintain
a steady preset temperature which is controlled by the occupants of the car,
it’s a bit like setting the thermostat on your home central heating system to
maintain a set temperature in your house but this one is more sophisticated.
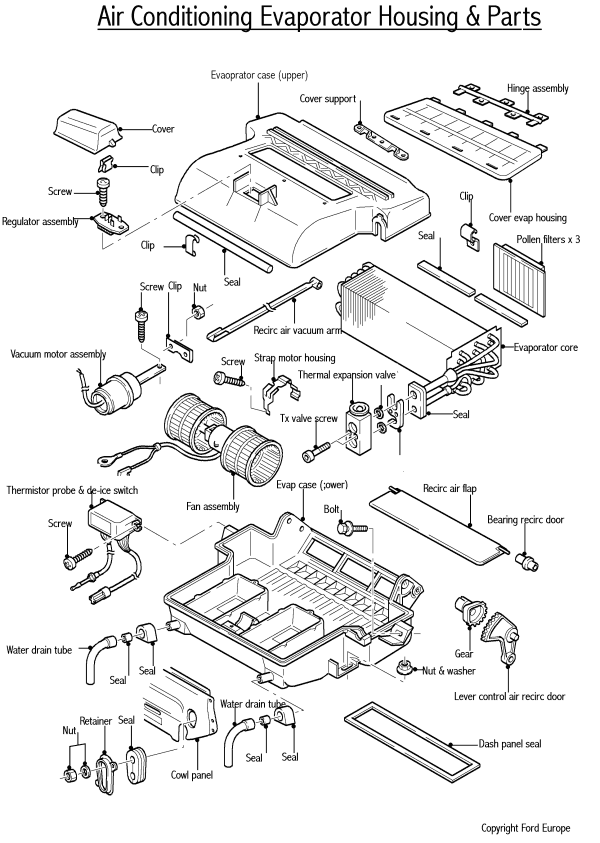
The cc system has a central processor located immediately behind the front
display panel connected to the display by a ribbon that can be detached if the
dash needs to be removed.
This processor receives inputs from
:-
A temperature sensor mounted on top of the evaporator
housing measuring external ambient temperatures.
A temperature sensor located in the middle of the cc
control panel measuring internal ambient levels.
Two temperature sensors located in the right and left
front footwell air ducts.
A U/V photoelectric sensor located on top of the dash on
the far right.
A speed sensor measuring the car’s velocity.
These sensors are checked and monitored four times every second.
The unit also controls the air distribution motors and the air temperature
blend doors as well as processing signals and controlling the other components
of the air conditioning system such as the compressor and Heater
Blower Controller (HBC).
The HBC is
mounted on the blower plenum and is a solid state variable resistance.
The fins
are to cool down the electronics as it's resistance increases to slow down the
blower motor.
Early versions of the
HBC tend to overheat and cause problems so later ones are fitted with a larger
(thicker) heatsink.
The whole system is designed to achieve the desired internal preset
temperature as quickly as possible and then to maintain that temperature
irrespective of the external ambient conditions.
The temperature controls of the cc unit can be set between 17 and 29
centigrade with additional settings of “Lo” achieving maximum cooling and “Hi”
for maximum heating. As a matter of interest the Lo setting has a value of 15c
and the Hi setting a value of 32c. For Fahrenheit buffs 17c equates to 62.6f and
29c equates to 84.2f.
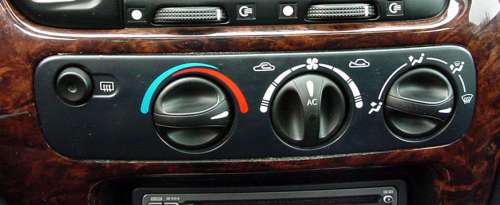
Passenger temperature set at low
There has in the past been confusion over the operation of the cc system so
we will run through a few of the basics.
Firstly don’t confuse the temperature of the air coming out of the vents with
the temperature that you have set in the temperature windows on the control
panel, they will rarely be the same nor should they be. A good example of this
would be setting in a nominal setting of 21c/70f , on a cold day with an
external ambient temperature of say 4c, the temperature coming out of the vents
at least to start with can be in the region of 38c. On a scorcher in summer with
the outside temperature of say 28c and with the temp setting on the cc unit
still set at 21c the vent temps may only be 5 or 6c. I’m sure you can now see
the logic behind the unit. Basically the set temperature is the temperature
inside the car that the system will attempt to achieve and to do this it will
pump in cold or hot air as required.
The system also has some clever features to achieve the desired temperature
as quickly as possible, when the “Auto” setting is selected the system really
comes into its own and in my opinion should be left in this position at all
times if you are going to get the best out it. This not only controls the
temperature of the air coming out of the vents but also the speed of the fans
and under certain conditions the recirculated air function and the air
distribution. For example if high cooling power is required when the ac is first
switched on then the system will automatically switch to recirculated air to
achieve maximum cooling even though the LED in the recirc switch will not
illuminate. At the other extreme when the outside air temperature is very low
the system will automatically go to the defrost setting for up to five minutes
and will override the manual setting of the air distribution flaps pushing the
air towards the front windscreen and it will set the air speed fans to low speed
to avoid blowing cold air into the interior.
NOTE: When the system is set to AUTO and the Air Distribution control is set
at Defrost the cc system will put the fan on as soon as the engine starts and
run the air conditioning pump in order to demist the front screen - this can be
disconcerting. If the Air Distribution control is set on any other position then
the fan will not start to operate until the coolant temperature exceeds the
interior temperature.
As has been said earlier the system also receives speed pulses from the speed
sensor to tell the cc module what velocity the car is travelling at. This is
used to control the speed of the fans to the air vents, for example if you are
sitting in traffic in hot weather then it will instruct the fans to speed up,
however if you are on the open highway doing 70mph then the air being forced
naturally into the cabin makes high fan speed unnecessary and it will lower the
fan speed accordingly.
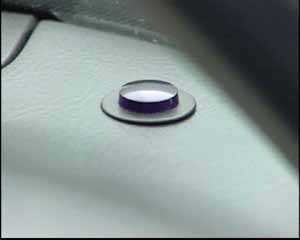
UV Sensor, technically known as the SLD
Another very clever and well thought out sensor is the UV or sunlight load
sensor located on the top of the dash, it's purple in colour and a lot of
Scorpio owners are intrigued to know what it is and what it does.
Well let’s investigate the theory behind it first. All temperature readings
that you see on weather reports and forecasts are taken in the shade, they are
actually taken from inside a white painted box with louvers called a Stevenson
screen. Say the temperature for example is 21c and its cloudy, it will feel
exactly the same in the shady area of your garden as in an area where if the sun
was shining it would be quite hot. Imagine then that the skies clear and now
when you walk from the shady to the sunny area of your garden. Your body detects
a noticeable difference in temperature as you feel the sun beating down on you.
But has the temperature being reported in the shade of the Stevenson screen
changed at all? Well hardly, maybe by a couple of degrees, but your body now in
full sun will feel the effect of the direct rays of the sun markedly. And
basically this is the idea behind the sun load sensor. The temperature sensors
in your Scorpio may not be registering much change in the internal ambient
temperature when the sun suddenly comes out, but you will feel the heat of the
suns rays on your body and will feel much hotter. The SLD (sun load sensor)
measures the intensity of the light falling on it and adjusts the cooling load
of the cc to compensate for the suns heat. Clever eh!
A Stevenson Screen
So let’s just recap. When the cc is set to “Auto” the blower speed is changed
continuously depending on the temperature setting, the amount of sunlight
falling upon the sun load sensor, the outside temperature and the velocity of
the vehicle.
You can of course deselect the auto operation and manually set the fan speed
to one of 27 preset speeds.
As far as selecting temperatures for the passenger and drivers side these
cannot exceed 6c difference, the driver’s side always has priority. The cc
system always defaults to ac “on” when the ignition is turned, this can be
manually switched off if required, after stopping the car the system remembers
the settings for approximately one hour after the ignition is switched off. Also
“recirculated” air can not be selected for 15 seconds after the car is first
started to allow adequate ventilation of the system.
Servicing
Just as the rest of your car needs looking after so does the ac system. It’s
a good idea to have an ac health check once every couple of years.
Loss of the r134a refrigerant by natural seepage of between 60g and 130g per
year is normal and as it is the refrigerant that carries around the lubricating
oil to the ac compressor if you lose too much refrigerant then no oil will reach
the compressor and it will seize, they are not cheap! Never has the philosophy
“prevention is better than cure” been more apt.
Do ask for the complete a/c report which will give
you vent temps, state of the system, high and low pressure readings, loss of
refrigerant etc etc, keep these with your other servicing sheets and you will be
able to keep an eye on the state of your cc system over the years giving you
good forewarning of any impending problems.
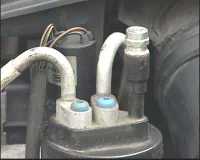
Low pressure fill and guage
valve with protective cap removed. Note the yellow UV dye is visible which is
introduced during the service.
Low pressure fill valve and
pipework.
The a/c specialist will evacuate the r134a from the system, weigh it to
determine the charge level, it will then be cleaned and any moisture removed.
Whilst this is happening the ac system will be drawn into a deep vacuum which
should be held for at least 30 minutes drawing any moisture out and checking for
leaks. After this time the cleaned refrigerant is gradually re-introduced to the
system a bit at a time and topped up with new r134a to the correct level to
replace that lost in previous years, oil is also topped up at this time. A UV
dye is also inserted so that leak testing can easily be carried out.
The high pressure fill and
guage valve located on top of the receiver/dryer, the high pressure switch can
be seen in the background.
An example of the ac service
report. Note that on the sheet you can see that since the last
service the charge level has fallen from the original 740g to 560g and it has
been recharged with 1000g and oil topped to 160ml to comply with the issued tsb
You can do an easy check to see if your system is performing to spec. Buy
yourself a cheap digital temperature probe, they don’t cost any more than a
tenner and can be purchased from Halfords, Maplins, CPC etc. Firstly take an
external ambient temperature reading outside the vehicle, make sure that the
probe is in the shade and not in direct sunlight, make a not of this
temperature. Then insert the probe a couple of inches inside the centre air
vent, then start the engine, make sure that all windows and doors are closed,
dial both passenger and drivers temperatures to “Lo”, set the fan speed to
maximum speed, press the recirculated air switch to on, set the air vents to
face level, run the engine at approx 1500 revs per minute and read off the
lowest temperature reading on your digital probe within ten minutes. The diagram
below shows centre vent temperatures that you should be getting if your system
is within specification. You will notice the correlation between the outside
readings and those at the centre vents.
Revs at just over 1500 rpm.
Centre vent temperature reading showing a
healthy 3.4c
A is the temp at the centre vent in centigrade, and B is the External temp.
For example if the external ambient is 15c then the vent temp should be
between 3c and 6c. Readings in between the two lines on the graph are acceptable
within spec.
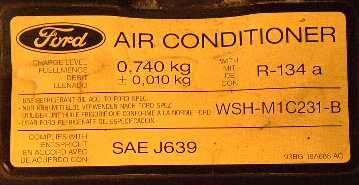
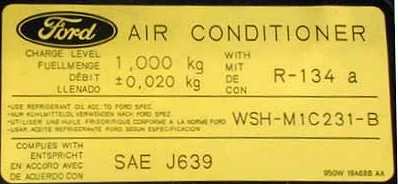
Next time you have the hood up on your Scorpio take a look at the bright
yellow sticker on the front cross member to the left of the car, this will tell
you what charge of r134a and oil should be applied, if it says 740g of
r134a and 100ml of oil plus or minus 10% then you have the old fill capacities
and you need to do some revision. In May 1995 a TSB no. 996/207 was issued
increasing the amounts to 1000g of r134a to improve cooling and 160ml of
oil to prevent compressor damage. You will need to order a new yellow sticker
from ford, part no.1 031 598, costing a few pence, to document the revised
amount.
Old A/C sticker
New A/C sticker.
The next point probably will not readily apply to owners of Scorpios with
Climate Control as if they have it fitted they will probably have it silently
running in the background all the time, but if not then do make sure that the ac
system is run for at least ten minutes every month, this keeps the compressor
lubricated and prevents the o rings from drying out.
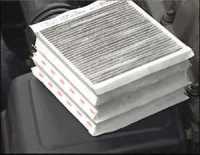
As you are probably well aware the system also filters and removes moisture
from the air making it especially useful in the winter for demisting the
windows. Pollen filters should be changed at least once a year, more often if
you do a lot of your driving in polluted areas, when you put the new pollen, or
cabin filters as they are sometimes called, they will be nice and white, when
you remove them they can be very dirty even black. If you leave them too long
they will eventually completely block up, preventing air flow into entering the
cabin. The filters are very easy to change and are located in the evaporator
housing just underneath the windscreen and easily accessed with the hood up,
there are three of them for the Scorpio, simply undo the clips on the top of the
housing, remove the black plastic lid and you will see the filters in front of
the evaporator. Before removing them, note exactly which way they are fitted so
that you can fit the new ones correctly, you may also want to order a pack of
clips for the evaporator lid housing, they are only a few pence and if you were
to drop one of the original clips then at least you will have some spare to
hand. When fitting the new filters in place be extremely careful not to touch
the fins of the evaporator itself, they are very delicate and easily damaged.
Evaporator with lid removed and pollen
filters clearly visible, note the red lines indicate the top of the filters and
the overlapping flaps should be at the front.
The Evaporator with the filters removed and
the delicate fins to the rear.
Pollen Filters (there are
3 of them)
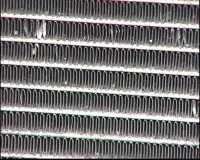
From time to time take a look at the ac condenser, this is located in front
of the radiator at the front of the car and is of similar appearance, it is
important to keep this clean and clear of debris, if this gets clogged by leaves
or especially insects in the summer months the cooling ability of the system
will be impaired. Take a water hose or preferably a compressed air line to this
from time to time and spray straight directly onto the fins to clear any
obstructions. Do not spray at an angle as this may cause damage to the fins.
(Viewed from
underneath)
There are 3 'radiators' at the front of the
Scorpio. The rear most is the water coolant radiator,
followed by the Air conditioning condenser and finally
the smaller Automatic Transmission fluid cooler.
The
Condenser mounted at the front of the car - this is not the radiator!
Close up of the Condenser
showing slight damage to fins and insects and debris that need removing.
Do not inflict further damage.
For details of Fault Interrogation and Climate Control Reset see
CC Reset