|
|
|
|
|
Last update: 08/03/2005 |
|
|
|
|
|
|
|
|
|
|
Richard S announced on the Forum that he was modding his front bumper. After a few weeks he had got to the pre-paint stage and put up a photo of the result so far. The quality of his work is amazing and I asked him to explain how he accomplished this for other Ford Scorpio owners.
These are his instructions and photos of the process.
Firstly, you need to find a shape that you think might look good on the car. Personally, I like the shape of the RS bumpers that are made mostly for Audi/VW cars, So I guess I was lucky when I found a bumper sticking out of a skip at a local bodyshop. I went in and asked if I could take it and they agreed. When I got it home I found there to be hardly any damage, just two small marks through into the plastic.
.
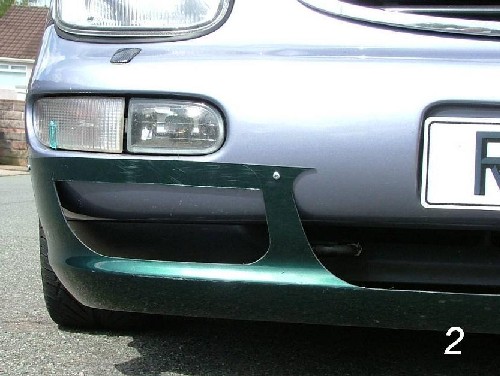
Pic 2. Cut bumper now mounted temporary with screws, note still not removed all of shape as yet for added strength.
Pic 3. Using masking tape, transfer marks from new to old bumper where you want to cut. I used a jigsaw for this but it tends to melt the plastic as you cut and weld itself back together. This takes patience and care.
Imagine the bumper as in Pic 4: in this position you have to lay the fibre glass on, only mix enough resin for 30 mins working at a time. (If you haven't used GRP before read up on it before you make a start, you'll find loads about it on the web) Cut strips about 3 X 6 inches and lay them onto the bumper. You need to cover the whole lot at least 2-3 times with standard mat, as I was scratch building and not using a mould I just let the fully wetted out mat hang to form the shapes for the front as they would hang vertically in this position. When you are happy with this you can add more layers it has cured. Once this has been done you can start on the back where any strength you think may be needed. If you are leaving the new plastic bumper in place don't forget to rub this down with a rough abrasive to give a good key and wrap the fibre glass around from front to back to stop any movement. When cured I used a dremmel-type tool to cut and tidy all the rear of the scoops that have been created for the mesh to sit properly. Now I sanded the whole front with a belt sander, and I didn't forget to use a mask!
Start with a rubber block and a grade 40 paper. Keep doing this filling and rubbing down with different grades of paper, up to a 400 grade until you are happy with the result.
Pic 8. The Grille. I cut the ribs out with a hacksaw and used the mini tool again to tidy up the edges,I roughed up the chrome outer and then placed it as i did the bumper, Then more fibre glassing, same process again, starting from the outermost part of the chrome edge and letting the mat curl around the edge of the chrome and into where the mesh will be, let this cure then repeat. When happy with the result it was on with the filler, again starting with 40 and working up to 400 grade paper rub down fill etc.
Back onto car for final checks to make sure all is ok.
Second coat was a spray putty/primer filler mix as I was not happy with the first coat. The next step will be flatting the bumper with a 600 wet paper and give it the final coat of primer before the basecoat and lacquer are applied.
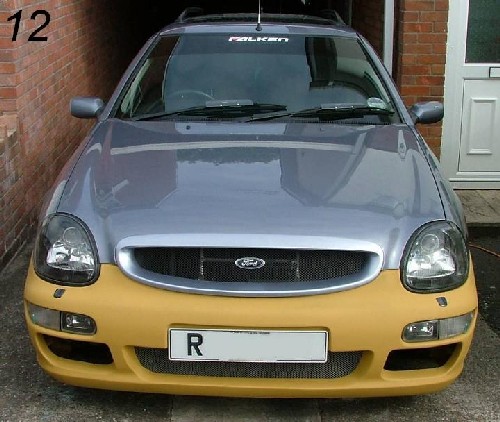
Note in Pic14 (top of page) the grille mesh is now silver and looks far better, and spotlights are fitted under the indicators.
Costs
|
||
|
|
|
Copyright © 2004 www.fordscorpio.co.uk |
|